Air Conditioning Retrofit

Spencer2829

Member
Joined
Jan 25, 2026
Messages
7
Hey folks. What a great group this is! I’m buying a used 2017 R23 OB and the first thing I’m going to do is have the bottom painted. In the near future I’d like to install AC, so I’m thinking I’d have a through-hull fitting installed while it’s out for paint. A couple questions:

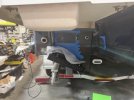
1. Does anyone have a picture of where the factory through hull fitting is for AC? I figure I might as well match the stock setup, unless anyone can see flaw in that logic.

2. How does the discharge work? Is that above the waterline? Where is it on the factory installation?

2. When they install the fitting, I figure they’d simply put a valve in there and leave it otherwise disconnected. That way I can install the AC while the boat is in the water and just turn on the valve once it’s connected. Am I thinking about that correctly?

Thanks in advance!
 
I am looking at doing the same. Rather than putting another hole in the boat, I am looking for a sea strainer that has an additional outlet. I do not believe teeing off of the existing raw water line downstream of the sea strainer is efficient enough to provide the necessary flow rate.
 
I am looking at doing the same. Rather than putting another hole in the boat, I am looking for a sea strainer that has an additional outlet. I do not believe teeing off of the existing raw water line downstream of the sea strainer is efficient enough to provide the necessary flow rate.
I had a similar thought. The AC manual says it needs to be a dedicated seawater tap, but of course they’d say that. Interested to know what others have done.
 
I researched a lot of a/c's and decided build a "swamp cooler" first, as we are snowbirds and head north in the summer and south in the winter so not feeling like we need to go the full a/c route (as we get older we find that we are more frequently cold than hot, haha). Basically, plum a small radiator with a couple of 12v fans blowing over the fins/coils and duct it into the v-berth. My experience is that it should cool to about 15 degrees below ambient temp. I already have a water pump and the radiators are not that expensive. Its also a very efficient 12v system. (we do not have the lithium set up to run an a/c offshore). Hope to have no more than $200 in it when its all said and done. If that doesn't provide enough cooling, then retrofitting an ac will be pretty simple.
 
Wow that’s a very creative idea. I’m in the puget sound so maybe that’s all I need too.
We used to live north of Seattle. If I were boating in Puget Sound, or anywhere else in the PNW, I wouldn't even be messing with the "swamp cooler"! We bought our used boat in Portland, OR and it came with the webasto diesel heater. Much more useful in our eyes than an A/C.
 
We used to live north of Seattle. If I were boating in Puget Sound, or anywhere else in the PNW, I wouldn't even be messing with the "swamp cooler"! We bought our used boat in Portland, OR and it came with the webasto diesel heater. Much more useful in our eyes than an A/C.
Thanks for the input! That’s helpful. Please post how the swamp cooler works out!
 
We just did a Webasto BluCool 10k in a 2020 R23 (actually installing as we speak). Must add a new raw water as the existing thru does not provide enough flow, this was verified by both the dealer, factory and webasto so we just added it, was not bad to do. You also need to add the waste water outlet hole as well on the side. AC power line was prewired to under the port forward seat in the stock location but not for the pump in the well. Make sure to get the easy start option otherwise it will ONLY start on dockside power. We also inverted the air outlet that we installed in the stock location in the port footwell to point more upward vs down to the floor, this makes a big difference in cooling. Then we ran a small 2in line into the v berth through the small passage way where the stock line ran. cost about $4500 parts and install.
 
  • Props
Reactions: mik
We just did a Webasto BluCool 10k in a 2020 R23 (actually installing as we speak). Must add a new raw water as the existing thru does not provide enough flow. You also need to add the waste water outlet hole as well. AC power line was prewired to under the port forward seat in the stock location but not for the pump in the well. Make sure to get the easy start option otherwise it will ONLY start on dockside power. We also inverted the air outlet that we installed in the stock location in the port footwell to point more upward vs down to the floor, this makes a big difference in cooling. Then we ran a small 2in line into the v berth through the small passage way where the stock line ran. cost about $4500 parts and install.
Thank you for the info! Did you put the through hull fittings on the port side under the seat? I assume that’s where you put the AC unit?
 
No you should put it in the stock location in the well next to the other thru hole (on the low wall just behind the gas tank in the well, as you have to run it to the strainer and then the pump which mounts on the wall in the well port side at the back of the boat then run the line up under the seat. From there waste water runs out with the other few holes aleady there on the side of the boat. I will be back up with the boat this weekend and try and get pics
 
No you should put it in the stock location in the well next to the other thru hole (on the low wall just behind the gas tank in the well, as you have to run it to the strainer and then the pump which mounts on the wall in the well port side at the back of the boat then run the line up under the seat. From there waste water runs out with the other few holes aleady there on the side of the boat. I will be back up with the boat this weekend and try and get pics
Awesome thanks! I’d love to see some pics
 
IMG_0649.jpg
This pic is not my current boat but another identical that we used as reference. You can see the install location from factory.
IMG_0999.jpg
This is my boat before we installed. I will try and get pics this weekend after install.
IMG_0651.jpg
here is a better pic of the reference boat (NOT MINE! this one was a mess lol) but yuou can see the location of everything. The starboard strainer is the other thru hole that you should already have for the toilet and other items on the boat. You can see the different parts used by the factory as this reference boat was a 2019 and mine is 2020 and they used different model strainers. Basically under the boat you will have 2 side by side thru holes.

We choose to do it this way since we have the boat out of the water anyway getting a seakeeper and a bunch of other upgrades. But I did have the thought to try and tap off the existing hole and it was highly suggested by everyone not to do that, even though I argued that how often am I running the toilet and the AC continiously.. But better to just match factory setup for both operation and future value of the boat.. We also opted for the better Blucool model over the webasto platinum that comes factory as it has the better touch screen controler and runs about 200w more efficient on power as we plan to be able to run on battery and motor for short periods.
 
very hel
View attachment 26929
This pic is not my current boat but another identical that we used as reference. You can see the install location from factory.
View attachment 26930
This is my boat before we installed. I will try and get pics this weekend after install.
View attachment 26931
here is a better pic of the reference boat (NOT MINE! this one was a mess lol) but yuou can see the location of everything. The starboard strainer is the other thru hole that you should already have for the toilet and other items on the boat. You can see the different parts used by the factory as this reference boat was a 2019 and mine is 2020 and they used different model strainers. Basically under the boat you will have 2 side by side thru holes.

We choose to do it this way since we have the boat out of the water anyway getting a seakeeper and a bunch of other upgrades. But I did have the thought to try and tap off the existing hole and it was highly suggested by everyone not to do that, even though I argued that how often am I running the toilet and the AC continiously.. But better to just match factory setup for both operation and future value of the boat.. We also opted for the better Blucool model over the webasto platinum that comes factory as it has the better touch screen controler and runs about 200w more efficient on power as we plan to be able to run on battery and motor for short periods.
Very helpful. I saw the 200w difference in data sheets. 200w seems like an enormous difference. I’ll take all the pictures I can get, and I’d love to see how the final install turns out. Please do keep us updated!
 
Back
Top