RangerRoamer
Active member
- Joined
- Jul 4, 2024
- Messages
- 26
- Fluid Motion Model
- R-27 (Outboard)
Has anyone installed a Garmin TD5 display in the helm of an R27?
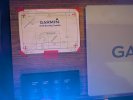
I'm comfortable with the wiring and connections, but I'm a little hesitant about cutting a hole in the helm. Garmin provides a template with clearly marked drill locations, so the process seems pretty straightforward. I'm planning to use a Dremel to make the cutout.
I'd love to hear from anyone who's tackled this themselves. Any tips, lessons learned, tools or things to watch out for?
I'd also like to save the $1,000 or so a dealer would probably charge, but I'm wondering if this is one of those jobs better left to the pros. Is the savings worth the risk?
I'm comfortable with the wiring and connections, but I'm a little hesitant about cutting a hole in the helm. Garmin provides a template with clearly marked drill locations, so the process seems pretty straightforward. I'm planning to use a Dremel to make the cutout.
I'd love to hear from anyone who's tackled this themselves. Any tips, lessons learned, tools or things to watch out for?
I'd also like to save the $1,000 or so a dealer would probably charge, but I'm wondering if this is one of those jobs better left to the pros. Is the savings worth the risk?