General musings for the Cutwater 28

mikey":qiv6udzx said:
having difficulty posting pic from an IMG tab-anyone can give details.

We have migrated the site to a new server in preparation for launching on a more modern platform. Unfortunately this broke persistent log-in. Any action taken in the photo albums, other than browsing or searching, triggers this bug and logs you out.

You can still use the Img tag to place an image available on a publicly accessible source (iCloud, Amazon, Dropbox, etc.) within a post.

We're working on a solution which will allow us to proceed. Thanks for your patience.
 
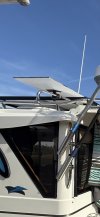
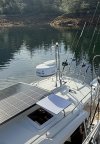
I installed a 360 watt yingli mono crystalline solar panel across the beam of the c28, along with a Triton 100-30 controller, #6 AWG wire from controller to house batteries. This puts it 24" from the radar dome giving 8-90 watts,25-35 volts,.5-3 amps on this cloudy/rainy Feb weather . Good enough to keep the house batteries between 12.6 and 14.1 volts with the fridge on 4.
 
Anyone close to Burnaby BC Hub Power has reasonable prices: 360 watt single panel mono-$325 Cdn, Victron controller 100-30 - $266 Cdn
 
a few additional upgrades to our C28.
1.cup and glass rack on port wall in galley
2.switch from thruster battery to house to improve house amps
3.Downrigger pads too far forward so mounted a pad on the stbd stern of the FG rail-great for crab/prawn trap hauler
4.installed bow ladder on stbd to climb to roof-aerials up/down
5.made wood cover over diesel tank for storage
6.open 4 portholes in V berth for ventilation when sleeping otherwise CO monitor blinks
7.4" of foam on V berth
8. 3" of foam on table bed
9.seal galley floor between FG and wood with sikaflex
10.auto pilot works great esp for fishing but steer manually in confused seas
11.moved tools and anything metallic or magnetic out of stbd locker away from CCU
12.replaced anchor with Vulcan 9
13. to adj stuffing box Milwauki adj wrench -Amazon
14.stern thruster is inefficient esp with down tabs-when coming in for a port landing have the wheel hard to stbd then give a short burst fwd to bring the stern to the dock and when there bring the bow to the dock with thruster- aware that too much bow thrust drives the stern the other way
great cruising/fishing boat
 
On Piglet we did the tv to mirror swap, easy just velcroed a visio 30 inch tv to mirror and ran wires under seats. We also removed the entire dinette in the front and made a vberth with memory foam mattress. We also removed the wine cooler and made a door, nice storage area. As also suggested added a galvanic isolator. We have the breakfast nook model and removed the second Microwave and sink the built a custom teak cabinet to set on the counter for added storage. On the back deck I added a holder for the handheld shower and sewed up some canvass that snaps in around the rear sunshade for a private outside shower. I fabricated a complete rear enclosure with nauseum screens. Our cockpit upholstery was old and hard so I sewed new ones that replicates the interior upholstery. We are currently doing the great loop and have been very impressed with the modification that we have added.
 
Robert-RPV":ht9kxxx4 said:
rocklobster":ht9kxxx4 said:
I agree about the red LED for the dash switches. It’s a little hard to see at night. I’d like to figure out how to add this. Maybe I can find a good light to use.

Joe


We just bought a 2010 C28 and I'm adding these small post lights over the switch panels:

https://www.pilotlights.net/led-panel-post-light-2-color-red-white-12v-or-24v

panel_post_red_white_a.jpg


They're available in a few different colors and styles....

FWIW . . . I was part of a Marine Corps Naval Aviation study back in the mid 1980s on the use of blue vs red night lights in the cockpit. The results of the study were that blue lights far outperformed the standard red night lights for clarity and night vision. Naval Aviation then replaced all the red night lights with blue.
 
BB marine":1kw59imx said:
scross":1kw59imx said:
Mikey,
Second the request for more info on the cockpit locker struts.

Piglet 2013,
My belief is that Fluid Motion provides capable boats set up to make a casual boater feel comfortable. Like buying a Jeep that you just use to go to the grocery store and back. If you want to use your stock Jeep on the Rubicon Trail then it’s going to need many modifications. Nothing wrong with making a capable basic product that owners can modify to suit!
After just a few months of ownership of a C-28 I’m looking at several Boat Bucks to get it set up for weeks long cruising away from marinas. Completely new solar system, new more capable starter and thruster batteries, a new dinghy and motor, vastly improved galley storage cupboards plus moving to more robust anchoring components for starters. Lots and lots of minor upgrades - many of which are mentioned in this thread.
Lots of work this winter getting ours ready for 2023!

When we purchased the C26 Cutwater in 2016 I quickly realized that this boat had the Swiss army knife design but was not really set up for long term cruising and anchoring. We planned on doing the Loop on board the C26 and I found that we had our work cut out to make this boat doable for long term cruising and anchoring.

The C26 is the same as the C28 from the pilot house door forward. So living space. The advantage the C28 had over the C26 was larger cockpit and better performance.

Issues that needed to be addressed.

V berth comfort, The as found cushions were fine for a short weekend stay but for long term cruising Back Breaking! This project was a complete removal of all the V-berth components and a custom made mattresses, mattresses base, shelves and TV installation.
http://www.tugnuts.com/gallery2.php?g2_itemId=72204

http://www.tugnuts.com/gallery2.php?g2_itemId=71235
Inverter: The factory inverter is not a pure sine wave. It was not clean house hold power. This inverter was only used for the outlets and microwave. The C26 that we purchased had an electric stove so while cruising the stove was not usable unless the generator is used. We did not have a generator! I installed a 2000W pure sine wave inverter and wired the complete AC panel to the inverter.
http://www.tugnuts.com/gallery2.php?g2_itemId=47250

Anchor: I did not have much faith in the Lewmar Bruce style anchor for a main anchor I also knew that there would be many times the anchor and chain would come up muddy. The small poor drainage of the anchor locker would quickly become plugged. The side decks on the 8.6" beam C26 or C28 are tough to walk around. Add a hose in your hand and bring it to the bow each time you need to pull the anchor. The anchor roller in my opinion was a bit on the cheap side and not really fastened that well by the factory. To fix for theses two items I installed a Kingston anchor roller which fits the Rocna anchor that I purchased better than the factory roller does and finished the project with a anchor wash down.
http://www.tugnuts.com/gallery2.php?g2_itemId=66293
http://www.tugnuts.com/gallery2.php?g2_itemId=52072

Hull Planing: With the added weight added for longer term cruising I found the bow of the boat was pointing to the sky when running at higher cruise speeds. I also found the boat was squatting (digging a hole at slower cruise speeds. The small trim tabs that Fluid Motion installed on the C26 and C28 were to small. 12 X 12 are not designed for a 26' or 28' boat. The minimum is 18 X 12. For this reason I installed drop fins to the trim tabs. This is a Must in my opinion if you own a C26 or a C28. I eventually installed 18 X 12 planes becai=use I planned on having the boat lifted by forks when I was in Florida.
http://www.tugnuts.com/gallery2.php?g2_itemId=48595

Shower: It is small and a project to use and keep clean. I decided if we were at anchor showering on the swim platform was a better solution. I installed a shower head HOT/COLD on the transom. But in the event we needed to use the wet head shower a good shower curtain was needed. I made rods and a curtain.
http://www.tugnuts.com/gallery2.php?g2_itemId=66245

http://www.tugnuts.com/gallery2.php?g2_itemId=47246

Batteries and Solar. I never did solar and should have. This was a major issue while cruising. The issue was If I installed solar it would not be enough to keep the batteries charged to 100 % after a discharge cycle. If using lead acid batteries Flooded, AGM or Gel if you want the batteries to last you need to fully charge them after a discharge. If you are at anchor for a few days you need more than 400 watt of panel. You will also need to run your Generator for several hours if you leave the factory installed 20 amp charger in the boat. You will need to upgrade the charger to a minimum of 50 amps and still plan on running the generator for a few hours each day. I did install 3 200w panels on my Mainship and find this to be borderline to recharge the house bank each day during winter months in Florida. It is enough during summer months with longer days.
I did up grade the batteries to Northstar.

Dinghy and Motor mount:
http://www.tugnuts.com/gallery2.php?g2_itemId=48516
http://www.tugnuts.com/gallery2.php?g2_itemId=47624

Fresh water filtering so we could use the water for cooking and drinking. We also used a Britta.

http://www.tugnuts.com/gallery2.php?g2_itemId=47254

With all theses upgrades the boat was comfortable but lacked one thing that I could not add. More Room !!! We loved the boat but found it to be to small and moved onto a boat with a few more feet of length 8' and 4' more beam. The one thing I miss is the ability to trailer.

What a tremendous eye opener for someone looking for a Loop boat. I had been thinking the C28 was the right boat, but based on your upgrades, which I would not have the skill to perform, you ultimately determined the boat was simply not large enough for your personal comfort. I have personally toured a C28 and an R29/R31 and thought one of those may be suitable, but my wife thought the living quarters to be too small for her on all of them. Thanks for taking the time to put this post together with pics.
 
Lots of folks do the Loop in them, and not necessarily with major modifications. There is a lot more space in the 29/30/31 boats, compared to 25/27/28, thanks to the wider beam as well as length.

But whether it's enough for any particular preference varies. Chartering one for a week is a great way to find out. (Personally we decided to get something larger for extended cruising, but that's just us, everyone differs!) Or just agree with the admiral 🙂
 
Where are these downrigger pads of which you speak?

On a c28. On the port rail just aft of the built in cooler and on the stbd rail just aft of the fuel fill. They are the black squares.
 
On a c28. On the port rail just aft of the built in cooler and on the stbd rail just aft of the fuel fill. They are the black squares.
Thanks. My 2015 C28 must not have them.
 
I figured this thread would be a good place to share some modifications I made to my C28 and also keep this thread alive —hopefully it’ll help others in the future.

1. Starlink Standard Gen 3 Permanent Install

The first upgrade was a permanent installation of the Starlink Standard Gen 3. I removed the old satellite dome and controller, then repurposed the satellite TV power supply (which just powers the TV) to connect to a 12V power adapter for Starlink (picked one up on Amazon—super simple).

I installed all of the Starlink hardware in the cubby behind the TV and added a “Starlink” rocker switch on the wall just to the right of the TV. This makes it easy to power the system on or off with a simple flip of the switch.

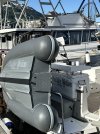
For wiring, I ran the antenna cable down the port side of the house behind the wall, up to the ceiling just behind the sink. I reused the same port that the satellite TV cable used to exit onto the roof. Initially, I wanted to mount the antenna on the mast where the satellite dome was, but because of the folding mast and the size of the Starlink antenna, it would have required a complex adapter and still might have interfered when folding the mast. (The Starlink Mini would fit nicely there.)

Instead, I mounted the antenna on the port aft roof rail next to the solar panel. It fits nicely there and stays out of the way. I’ll add photos of the antenna, though I forgot to get a picture of the rocker switch setup.

Note you’ll need to put a larger fuse in the “tv” fuse slot. This will be on the fuse block behind the dash access via the head. I put a 20amp fuse in for the time being.


2. Cockpit Cooler & Fillet Table Conversion

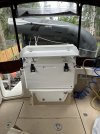
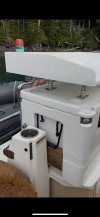
Next, I removed the centerline cockpit seat and installed a 120qt Lost Creek cooler. I reused the original seat mounting bolt locations but used longer bolts and taper-cut 2x6 lumber to secure it. I also added a garden hose adapter to the cooler’s drain, allowing a valved drain to run just under the swim step.

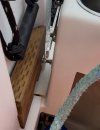
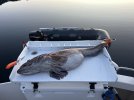
To top it off, I had a custom 24”x40” fillet table made and mounted it to the cooler lid using four stainless steel handrail-style mounts. This setup isn’t perfect, since the lid has to be opened to access the cooler, but it was the least invasive option I could come up with—partly inspired by another C28 owner.

Overall, I think it does a great job solving the lack of a fish hold on the C28, or at the very least provides an excellent cooler space that can actually hold ice for days. The cooler can be removed in seconds if needed, and the original seat can be reinstalled in just a few minutes, giving you the flexibility to switch between the seat and cooler depending on your trip. For reference that’s a 48” lingcod I guess I should have gone bigger on the fillet table…..


Links:
(Starlink gen3 standard mount) PICURA Starlink Gen 3 Rv Ladder... https://www.amazon.com/dp/B0DR2CKGJJ?ref=ppx_pop_mob_ap_share

(Starlink power adapter) Starlink Gen 3 Power Cord 12V to... https://www.amazon.com/dp/B0DLZWHPKJ?ref=ppx_pop_mob_ap_share

(Starlink rocker switch) DaierTek Starlink Rocker Switch... https://www.amazon.com/dp/B0F3HRDKNX?ref=ppx_pop_mob_ap_share

(Lost creek cooler seems they are out of stock but I believe this is just due to a “sportsman’s” rebrand, I had found multiple rotomolded coolers that would have worked.) https://www.sportsmans.com/camping-...aXghXAqlMsVu4wsHZpU7v5bL7tlI_S70MYioPrXVfkWwM

(Cooler drain plug to garden hose adapter) Cooler Drain Plug Hose Connection... https://www.amazon.com/dp/B0BV1ZNYRN?ref=ppx_pop_mob_ap_share


IMG_0153.jpegIMG_0221-compressed.jpegIMG_0300-compressed.jpegIMG_0301.jpegIMG_0298-compressed.jpegIMG_0299.jpegIMG_0283.jpeg
 
Back
Top